


The most fun part of trying out new software is logging in or getting the “hello world” version up and running. What’s difficult and tedious, is when it takes days instead of minutes to get started. Since its launch, Tiny Cloud has had an overwhelming, positive response. There are more than 20,000 applications launched using TinyMCE, and more than 1 million active users every month. And a key reason for this success is that it takes just minutes to get Tiny Cloud up and running with an API key.
Even though thousands of new developers hear about us at events, and more are joining us every week, we receive a lot of queries about setting up the API key:
“How do we get our API key?” and “How do I get set up with my TinyMCE API key?”
If that’s you, remember this: five minutes is all it takes to create an API key, and set up a Tiny Cloud-based editor. This article shows how to get your API, and get started with TInyMCE Cloud in 5 minutes. Check out the video tutorial, and read on for the step-by-step guide.
And here's the transcript:
Hey it's  John from tiny and i'm going to show you how to set up tinymce in under
five minutes. Let's get started first go to tiny.cloud and sign up for your account
confirm your email address once you're in go to the domains page here you can add your dev or production
domains localhost is added by default and since I'm developing locally I don't have to
add anything here go back to the dashboard and here you'll see your unique api key you'll need your api key anytime you
load tiny mce from the cloud there's also a sample html file here i'm
going to go ahead and copy the html into my editor and load it up and here's the default tinymce editor loaded and ready to use
from here Ican change the settings to whatever I want you can see all the config options as well as over 50 tiny mce plugins on tiny
docs so what's next now that your tinymce cloud account is set up and tested try
tinymce in your app check out our docs to see how tinymce can integrate with some of your favorite frameworks like react angular and vue
get your free api key at tiny.cloud
Get an API key
To start, you’ll need your API key. If you haven’t signed up for Tiny Cloud, you can do that now — it’s easy to log in using your Google or GitHub credentials. Once you have an account, you can view and copy your API key directly from the account dashboard.
You can then take a look at your dev environment, and get it ready to go. The TinyMCE API key is designed to work in a JavaScript configuration. In your dev environment, whenever you’re adding TinyMCE to your project, create a TinyMCE init script, and add your API key as the value for the api-key option.
There’s more information available in the docs for you to get clarity on what you can do with your TinyMCE configuration.

When to use the API key
TinyMCE is available through more than one method: Tiny Cloud is just one method. You can also self-host TinyMCE, where an API key isn’t required. However, if you’d like to access Premium plugins and other useful features from TinyMCE through a paid plan, you’ll need to configure the API key you receive when you sign up.
For Tiny Cloud, adding your API key allows you to not only access any Premium plugins you’ve purchased as part of a paid plan, it also means easier monitoring of how many times the TinyMCE editor has loaded, which is useful data for monitoring and responding to any bugs or performance issues. With more information, Tiny can continue adding to the overall quality and performance of the TinyMCE rich text editor.
💡NOTE: You can check on editor loads by logging into your TinyMCE account, and accessing the Settings menu on the left navigation tab. Check under the Historical Usage heading for editor loads.
Check on the Docs for more information on using your API key, such as using your key with Tiny Cloud to prevent the editor changing to read-only mode.
A note about adding domains to your API key
Be aware that initially your API key is automatically configured for use in http and https localhost environments. If you’d like to add or edit the domain information, it’s best practice to do this before initializing the editor for the first time.
It’s not a big deal if you do it later, just expect a short delay to domain updates as your changes propagate across our global CDN.
If you’d like to add a domain to your API key now, it’s a quick task. Here’s how it’s done:
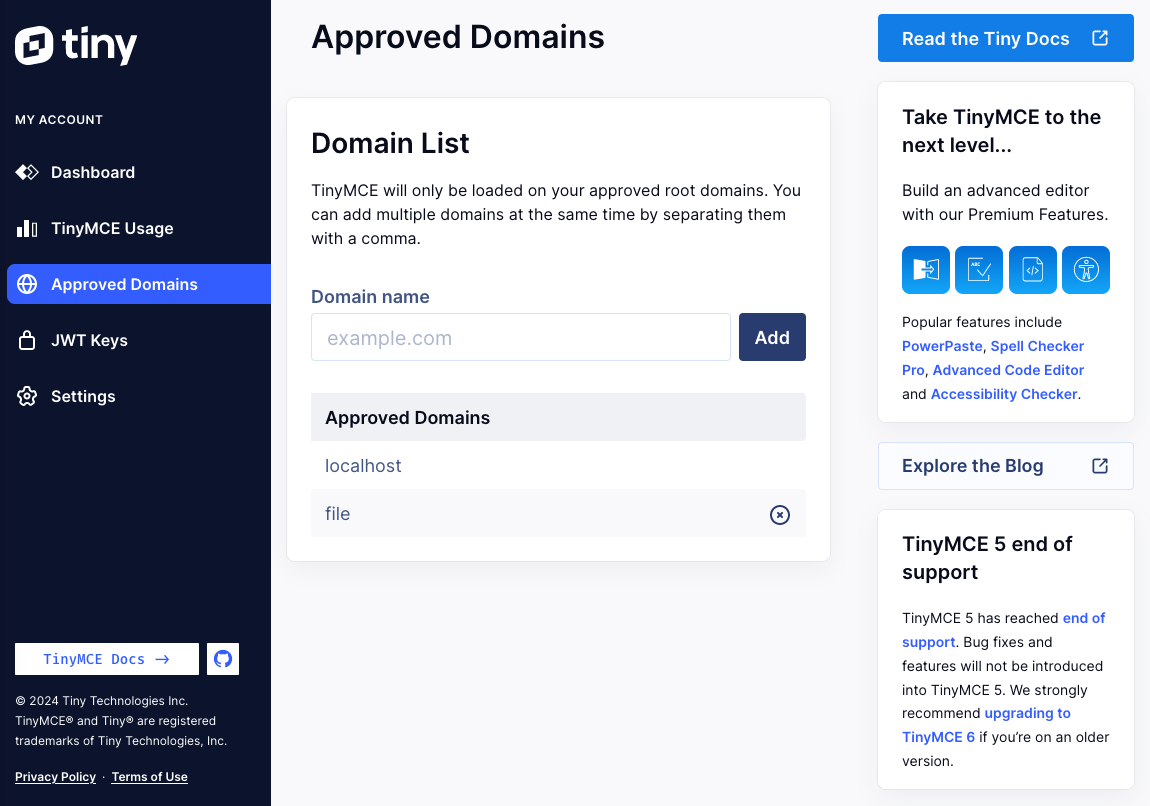
Step 1
Login to your Tiny account and view your approved domains. If you haven’t already verified your email address, you’ll need to do that before you can whitelist TinyMCE on your domains.
Step 2
Add the domains you wish to assign to your API key. For example, if you want TinyMCE to load on store.example.com, type that into the Domain name field and click Add domain. You can add as many domains as you like.
Get TinyMCE up and running
At this point, your API key is set up and ready to go. Now, let’s get your first Tiny Cloud instance of TinyMCE running.
Step 1
Getting the editor working on a page is as simple as including the TinyMCE script in the <head> and initializing it on a page.
You can find example HTML on your account dashboard with your API key already inserted in the script. Copy the code directly from there to create an HTML file hosted on your server.
Step 2
View the page in a browser. Assuming you’ve added the API key correctly, and added domains (if required), you should now have TinyMCE running from Tiny Cloud without the message asking about domains.
If not, you can contact Tiny Support any time for assistance. (TinyMCE support is included with the 14 day free trial when you sign up for an API key.)
From here you can start customizing it, for example, configuring the plugins and toolbar options available. You’ll find some examples in our docs:
Our plugin docs are also a great place to start.
Integrating TinyMCE into your project
Now that you’ve set up a simple instance of the cloud-based TinyMCE editor, you can start integrating it into your own projects.
Integrating with React, Angular, or Vue? We’ve created wrappers that simplify integration with these frameworks. Check out our blog posts on how to get started with TinyMCE in simple React, Angular, and Vue projects.
There’s a lot more information in our docs too:
What’s next?
If you’d like to build an even better content creation experience, check out our Premium plugins. (These are already included in the code example provided on the Tiny account dashboard.)
We love hearing from our developer community. Follow us, and feel free to reach out to us any time.


