


Being one of the world’s most flexible rich text editors means you can tailor the look of TinyMCE to your needs. Skins are what control the appearance of the editor, including colors, margins, fonts, etc. The default skin is called Oxide, however, with TinyMCE you have the option to easily create your own skin using Oxide as a base.
Note: there is a difference between skins and themes, where themes allow you to replace the whole UI with your own. But that is a lot of work and not something we generally recommend anyone doing.
Today, we’re just going to look at skins and how you can create your own. Let’s get started!
To save our users time and energy, we developed the TinyMCE 5 Skin Tool, allowing you to intuitively customize the look of TinyMCE 5 for both cloud and self-hosted users.
Go to the TinyMCE 5 Skin Tool.
Setup
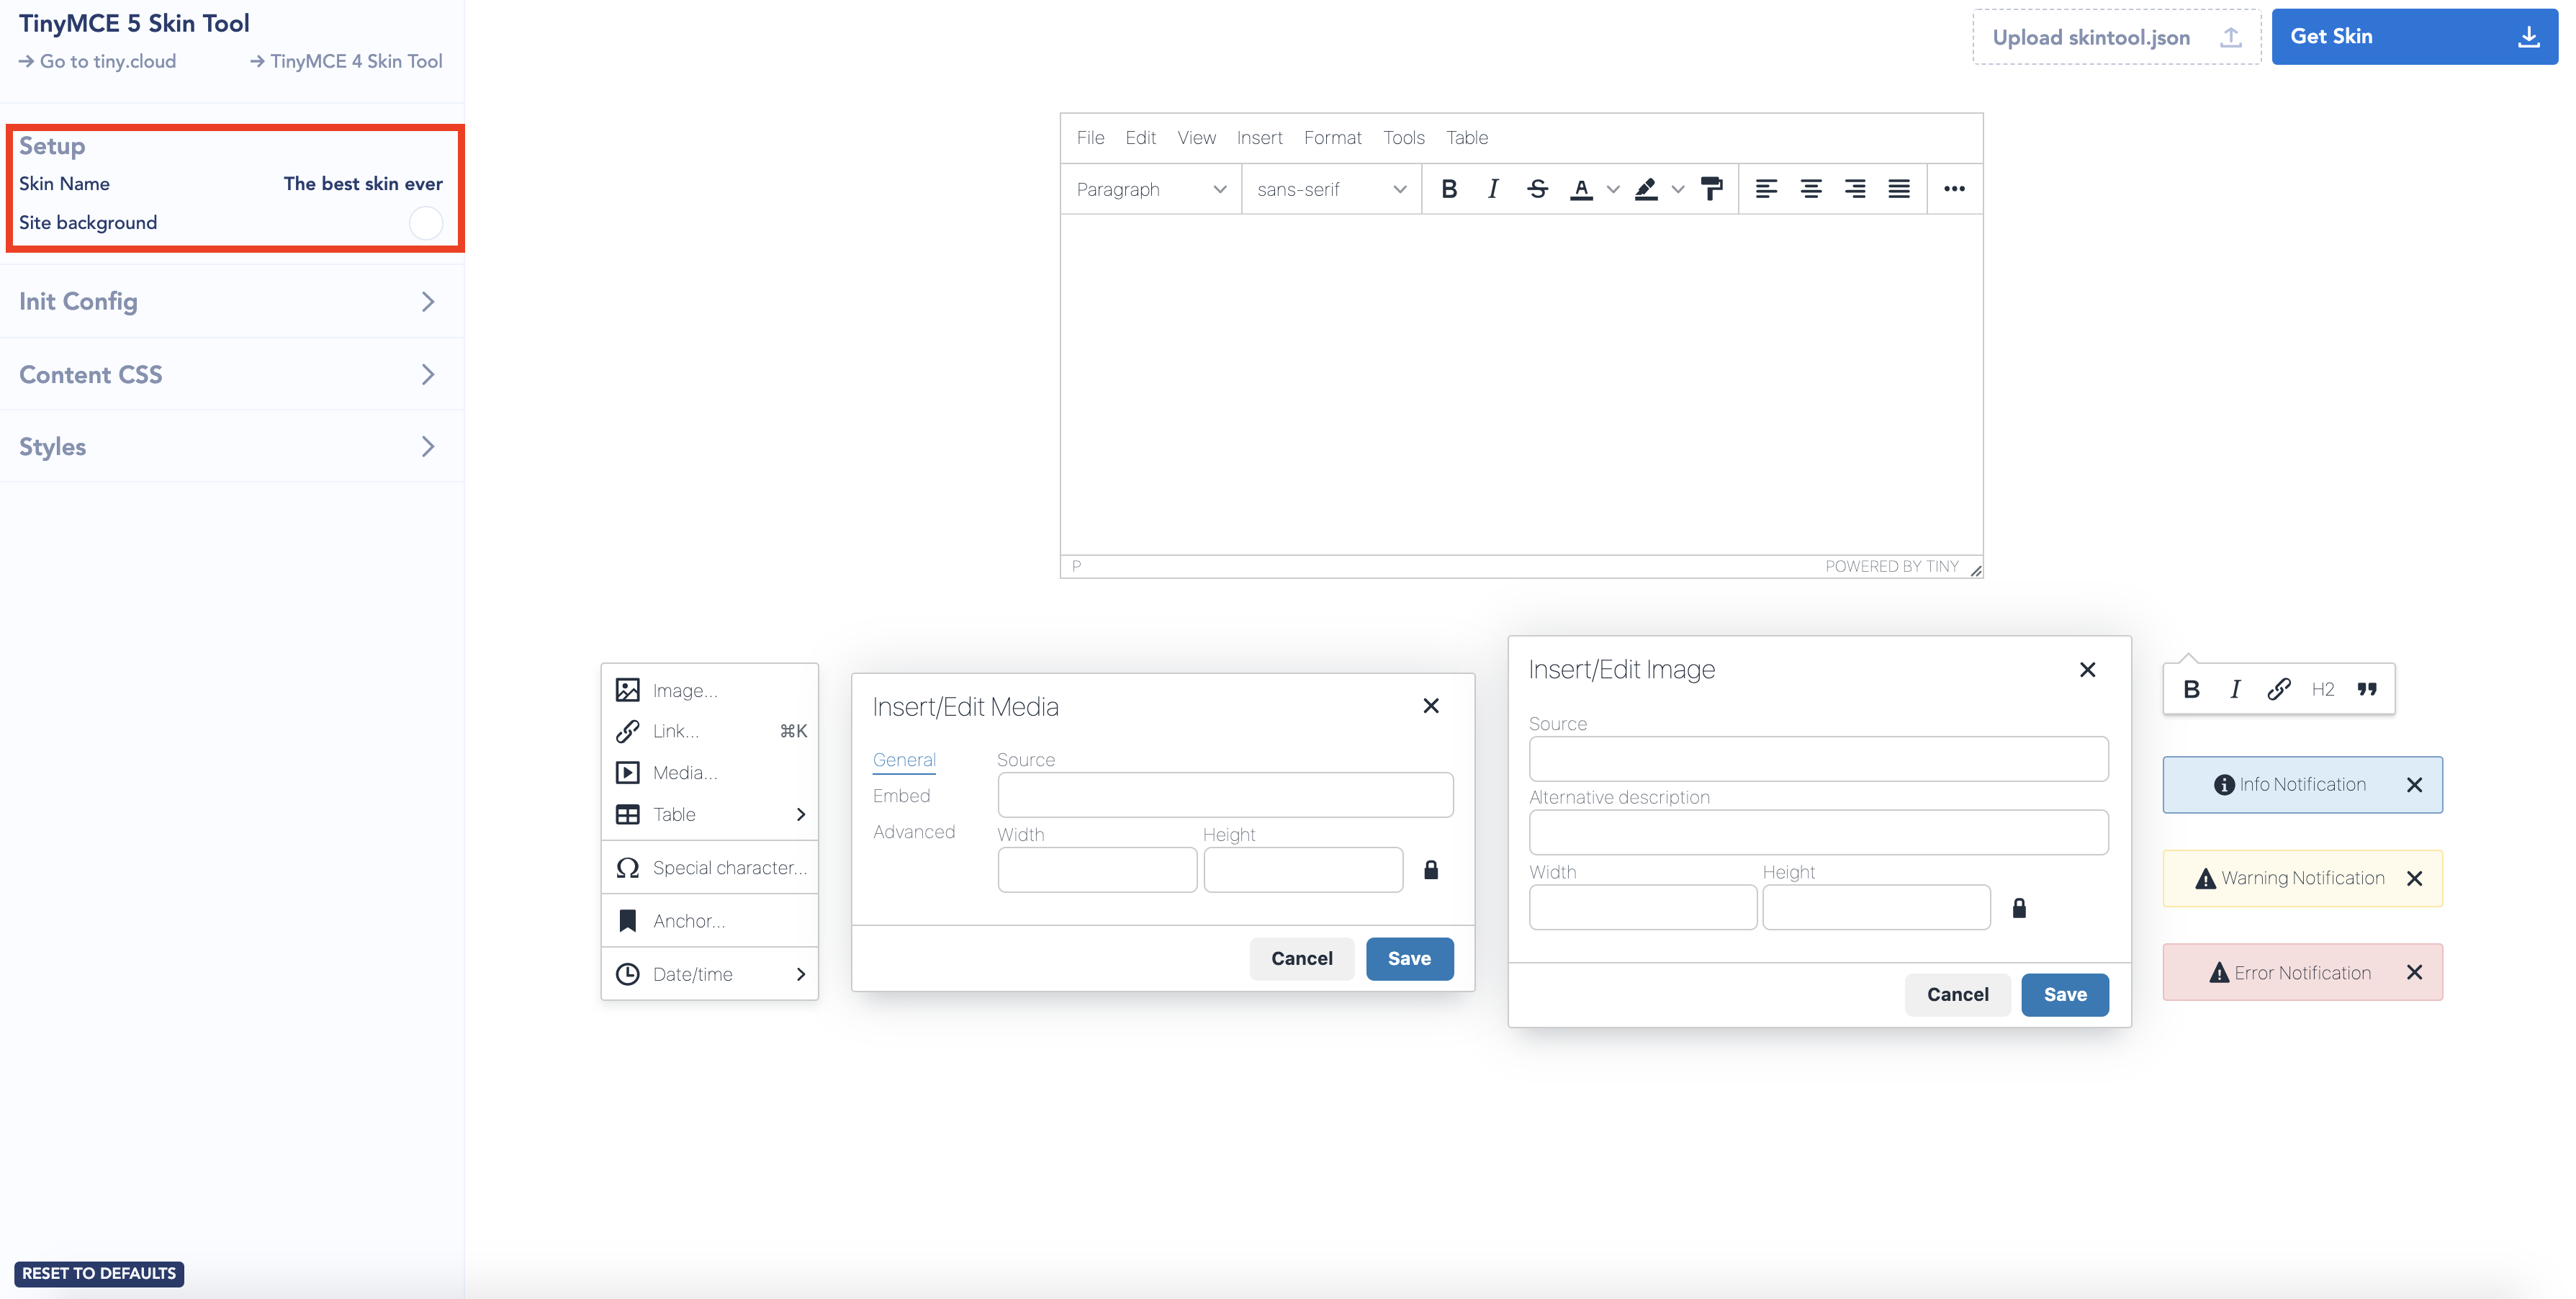
First thing's first, set up your skin by choosing a name and selecting a background. I recommend selecting the color in which your editor will operate, this way you can work in the most accurate visual environment.
Init Config
Next, use the init configuration to customize the behavior and user interface options of TinyMCE. Again, I recommend setting up TinyMCE here as it is (or will be) on your platform. You can customize different options such as block formats, toolbar controls, or hiding the menu bar. Make sure to click the run button once you’ve made your configurations.
By default, the Skin Tool automatically gives the following configuration:
tinymce.init({
  plugins: [
    "a11ychecker advcode casechange formatpainter",
    "linkchecker autolink lists checklist",
    "media mediaembed pageembed permanentpen",
    "powerpaste table advtable tinymcespellchecker",
  ],
  toolbar:
    "formatselect | fontselect | bold italic strikethrough forecolor backcolor formatpainter | alignleft aligncenter alignright alignjustify | numlist bullist outdent indent | link insertfile image | removeformat | code | addcomment | checklist | casechange",
  height: 360,
});
For a comprehensive guide of the user interface options, read through our user interface documentation.
Content CSS
Here you can edit the style of all the content within the editable area of TinyMCE. This is where you define the look of headers, tables, links as well as adjusting colors, margins, and paddings. The Skin Tool provides you with sensible defaults but if you are into web publishing you should match these styles to the ones on your site for the best WYSIWYG experience.
Check out our documentation for more information regarding content_css.
Styles
Now, this is where the color fun really begins! Under the styles tab, you have a range of options to configure, which allow you to customize different aspects of the editor’s appearance. The options included, but not limited to you are:
- Editor Background
- Toolbar Background Color
- Border Color
- Color Black
- Color White
- Tint Color
- Error color
- Success color
- Base size
- Controls border radius
- Panels border radius
- Editor border radius
- Font Stack
- Normal font weight
- Bold font weight
- Toolbar button icon color
- Hover background color
- Hover icon color
- Focus background color
- Focus icon color
- Active background color
- Active icon color
As you adjust these settings you are given a live preview of the changes you make. This is what makes our Skin Tool so intuitive - consider it the WYSIWYG editor of skinning.
Helpful hint: make sure to keep the ‘px’ after the numerical value whenever you’re changing pixel densities.
Now, if you’re feeling adventurous you can explore the advanced mode and get access to the 300 or so variables you can use to tweak the look of TinyMCE. However, this will require you to be familiar with CSS and you will also need to know how to browse the source files on GitHub to locate the variables available to you. For the scope of this blog post, we will not be diving into the advanced mode of the Skin Tool.
Load your skin into TinyMCE
So you’ve created the perfect skin and now you’re ready to use it - woo! The first step is to download the skin by clicking the Get Skin button on the top right-hand corner.

This will provide a .zip file containing the UI and contents, which will be named according to the name of your skin during setup.
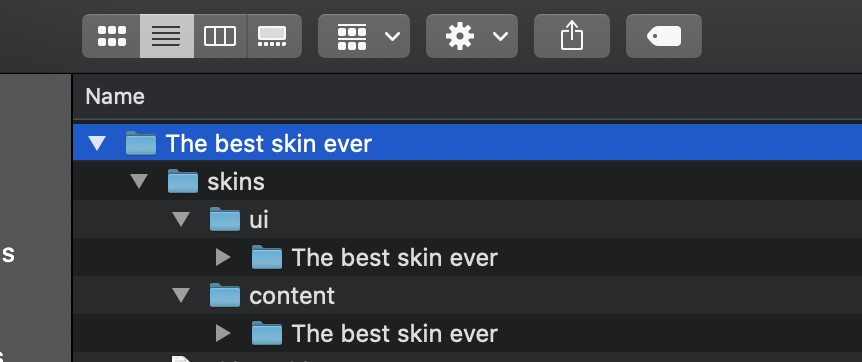
To use the skin you will need to put the folders (the one under "ui" and the one under "contents") on a server. This is applicable for bother cloud or self-hosted TinyMCE instances. Afterward, you use skin_url to point to the location of the "ui" folder and use content_css to point to the location of the content folder.
And that’s it! Those are the essentials of how to use the TinyMCE 5 Skin Tool. For more in-depth information make sure to check out our documentation on skins.
If time is not on your side or you want to match the look of some popular design frameworks like Bootstrap and Material, I highly recommend looking at our premium Skins and Icon pack.
Or, if you’re interested in learning more about skinning, we have several other blogs dedicated to TinyMCE Skins:
- A new approach to skinning TinyMCE 5
- Give me some skin: TinyMCE skins and icons
- New premium skins and icon pack
- Skins and Icon Packs: a closer look at your options
As always, make sure to contact us or visit us on Stackoverflow if you’re having any trouble. Also, if you’ve made a cool skin that you think we’ll love, make sure to get our attention on Twitter by using @joinTiny!


